Background
Back in 2020 I wanted to find a way to integrate my car’s auto-start capability into my Home Assistant setup so that I could have Home Assistant auto-start my car when the Waze integration determined it was time for me to leave for work in order to arrive at a certain time.
Unfortunately as far as I’m aware Nissan doesn’t provide any kind of official API to tie into what they call their telematics system which is what lets you remote control your car through their NissanConnect app.
So first I tried just sniffing the packets coming out of the app and doing a MITM attack. Fortunately for their security, but unfortunately for me they use SSL with key pinning so I wasn’t able to glean any useful information that way.
Then it occurred to me that since it was available as a free Android app it’d be fairly trivial to decompile the apk file and from there I could just reverse engineer their entire protocol.
Long story short it turns out the protocol was fairly simple and just required sending my NissanConnect username and password and getting a token in return. So I took what I learned and wrote it into a Python script I could call from Home Assistant to automate starting my car. I also added the ability for me to send my car commands through a Telegram bot.
Version 2.0
This worked great for 2 years then suddenly stopped working one day earlier this year. At first I thought maybe Nissan had just finally blocked the app-ID I was using since the auth API required sending cv.nissan.connect.us.android.25 in the CV-APPID header and this was hard-coded into their app. So once again I took the latest version of their Android app, decompiled it and pulled the file with the header constants. To my surprise though the app ID hadn’t changed, but the base URL for the API had. So I tried changing the base URL in my code as well to no avail.
At this point I began to suspect that the API itself had changed, but I was kind of surprised that they would’ve just cut off their own app’s access. So I tried downloading the previous version of the app from APK Mirror which was only a week or two older than the current version and sure enough that older version wasn’t even able to login.
Re-Reverse Engineering
So I began the process of re-reverse engineering how their API worked from the source code. Unfortunately their app appears to be a bit of a hodge-podge of different code bases and APIs so it can be hard to tell which calls go with which APIs.
After spending a bit of time jumping around through Java calls and definitions I eventually found that they had rearchitected the way that authentication worked on the API to require the app to first retrieve an access token in order to place a call to the endpoint that would allow the user to login. This process involved having the app login itself with some credentials which were hard-coded into the executable.
Tracking Down the Right API
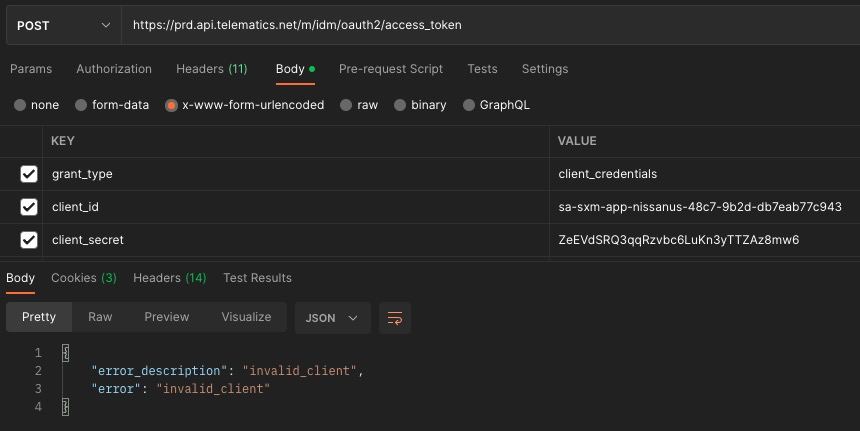
This turned out to not be quite as easy as I had hoped. Simply passing the hard-coded client ID and secret along with the request just resulted in an “Invalid client” error. This sent me down a bit of a rabbit hole because I figured given the error message the problem must be with how I’m authenticating the app.
After spending a few hours hitting dead end after dead end I decided to spend a bit more time tracing exactly what the app is calling for each step of the authentication process. This was when I noticed that the API base-URL I was using was not the only one defined in the BuildConfig. There were in fact 10 different base-URLs each going to a different API. This was a lot different from the older version of the app which only used two API base-urls: one for logging in, one for sending remote commands.
Following a bit more digging I finally realized that I was actually using the wrong endpoint for the initial app authentication. I had been using BASE_URL which I suppose is the generic endpoint, what I should have been using was CV_BASE_URL. So I tried again with this new URL.
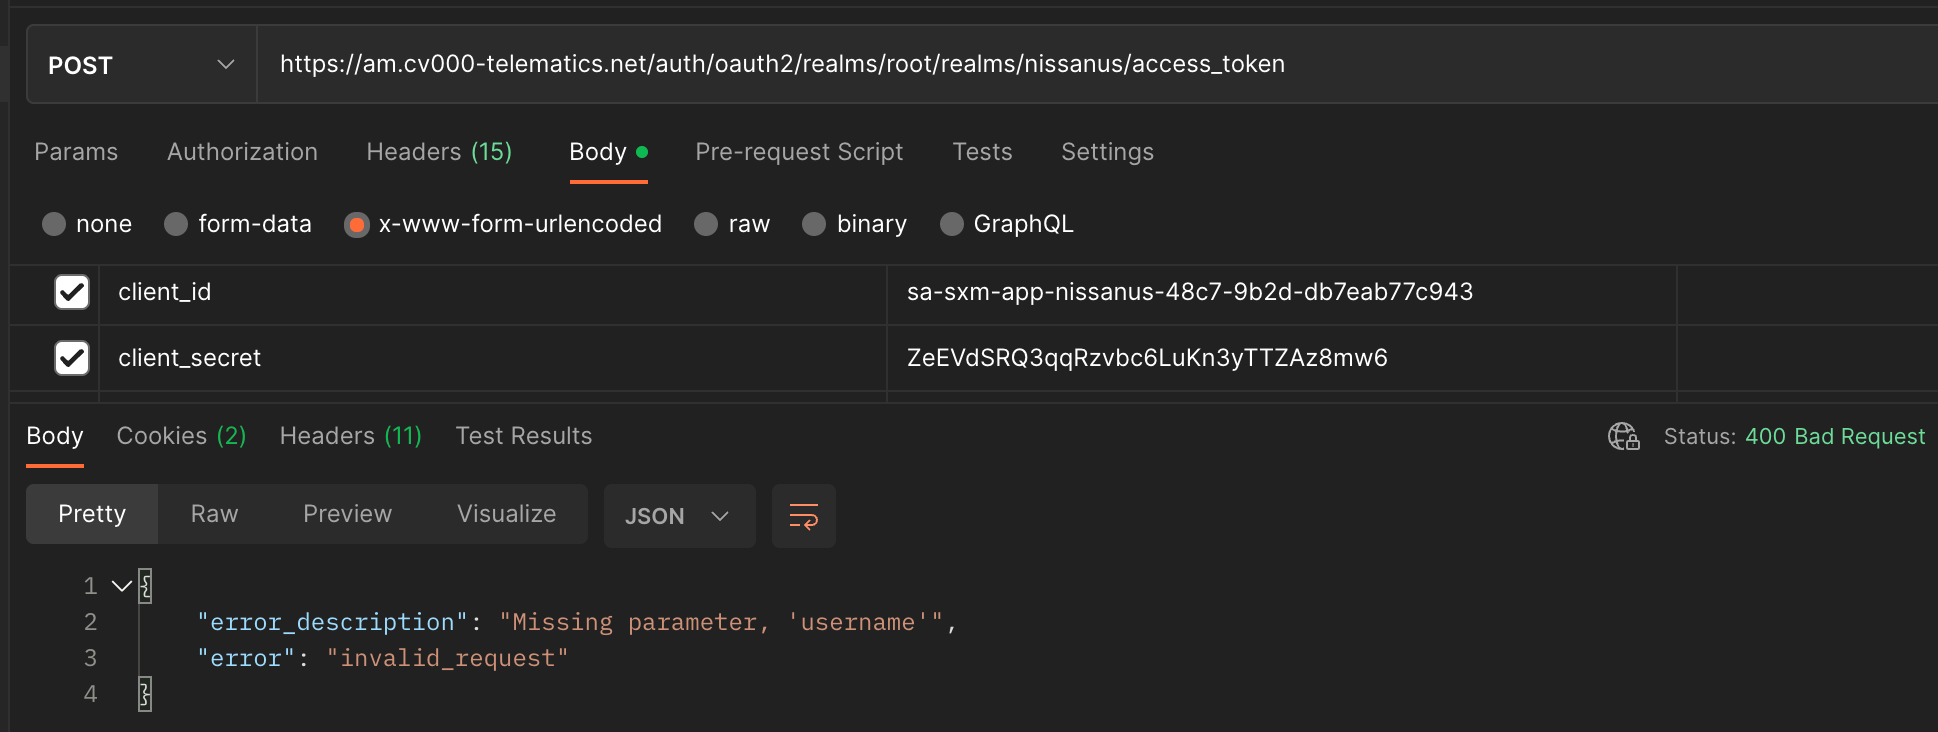
Not Quite Authenticated Enough
Close but no luck. This was at least a slightly more helpful error message. I knew I needed to provide a username and presumably a password. So I first tried providing the username and password I use to login to the NissanConnect app since this was previously all the old API required. This at least got rid of the missing username error, but just resulted in another error:
|
|
So what username and password was it looking for? Luckily this was fairly easy to find, as this was also hard-coded into the app’s source code. As it turns out, not only do you need an OAuth-style client ID and client secret, but the app itself also has it’s own username and password that it uses to login to the API in order to get its initial auth token. Personally this seems incredibly redundant to me. Requiring what is essentially two usernames and two passwords to login to the API isn’t any more secure than just one ID and secret when both of them are hard-coded in plain text into the source code, but I guess it made sense to someone at SiriusXM.
Newly equipped with my dual username, password, and a slightly lower level of respect for the API developers I tried again and got this:
|
|
Getting closer. Now there were a couple of different “scopes” available to choose from in the source code. At first I just tried passing openid as the scope since I figured that’s all I needed for logging in. Nope, I actually needed to include a few more keywords I don’t understand. Then I tried passing in openid tes cps. What are TES and CPS? No idea. But finally:
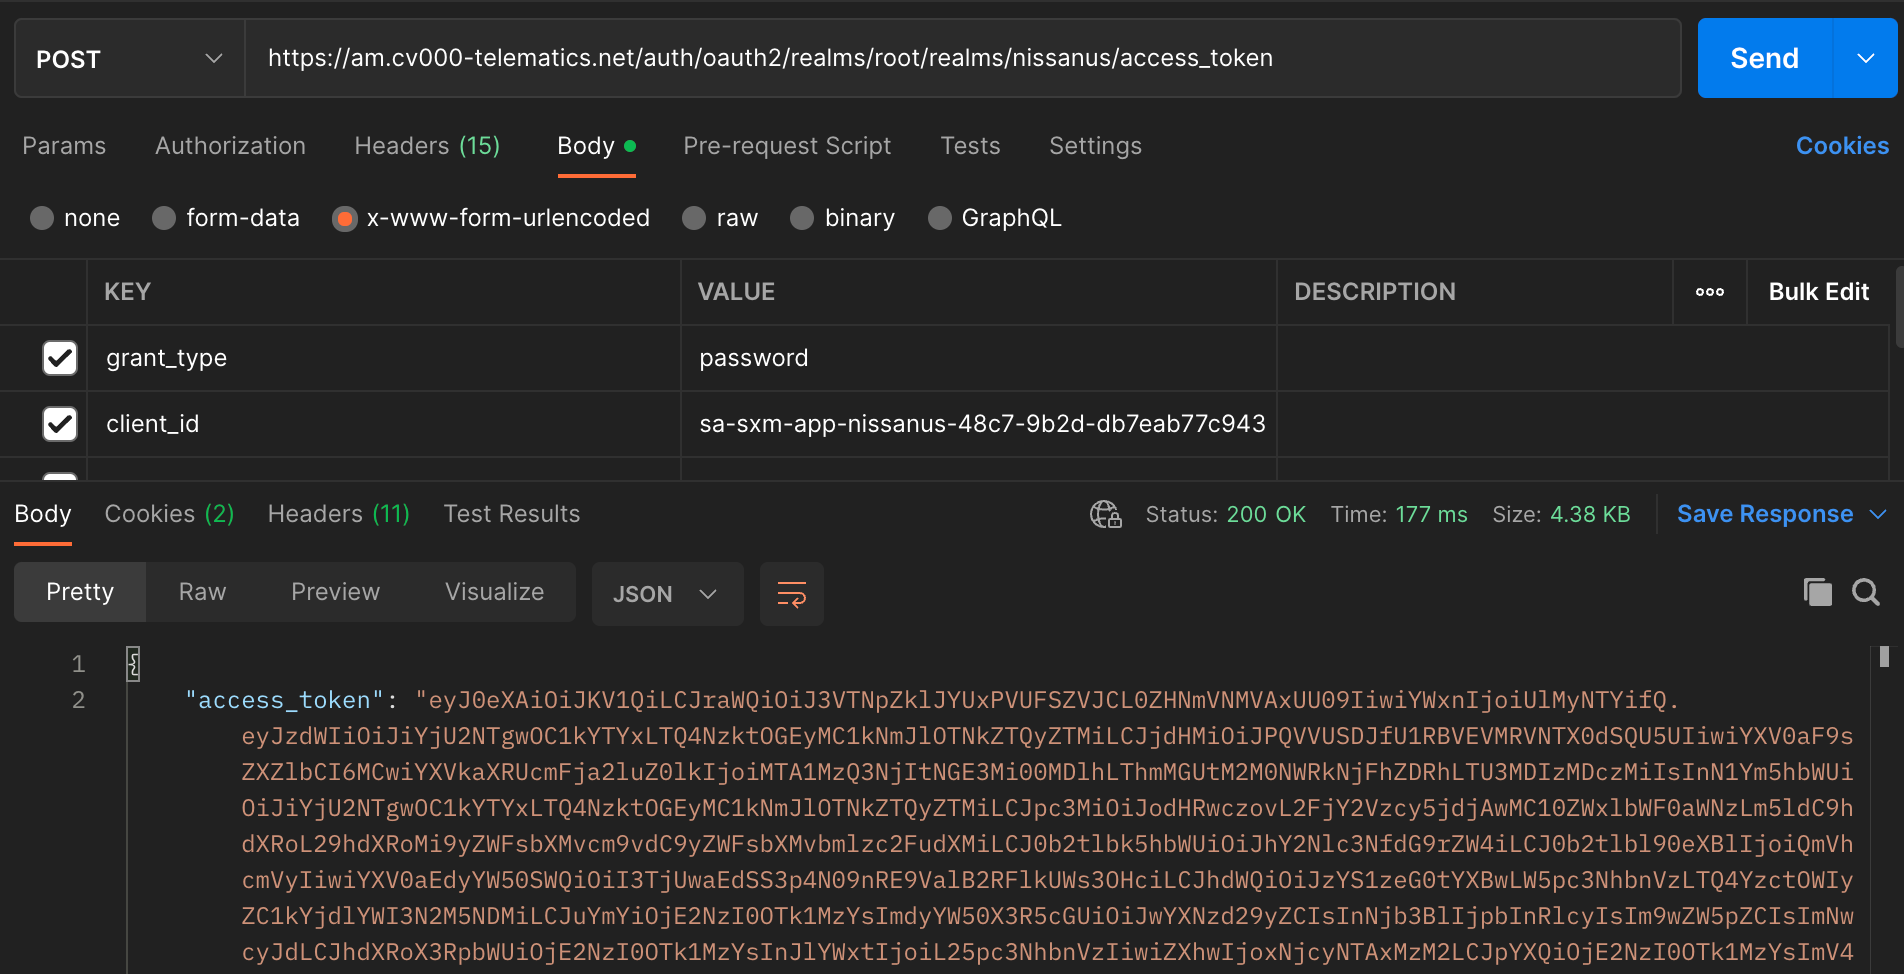
Login to the Login
Now we’re getting somewhere. But I still hadn’t even logged into my account yet. This was all merely to get access to the login API, something that in the previous API version required no authentication at all to access.
Luckily the actual login process was fairly similar to the old API. It just required figuring out the correct API base-URL (which for some reason was passed directly into the OpenID function in the session manager rather than being defined as a constant in the BuildConfig file like all of the other base_urls), passing in the auth bearer token from the first authentication step, and providing your actual username and password as a JSON-encoded body of the request.
Sending Some Commands
Finally, equipped with the auth bearer token from the first step, and the id_token from the second step I could finally send commands to the car. This involved a third separate API, in this case the RTS API. And is just a matter of making a POST request to the particular endpoint for the command you want to send for instance: https://rts.cv000-telematics.net/telematicsservices/v0/vehicles/remote-horn-and-lights, and including the auth bearer token from the first step, the id_token from the second step, and your car’s VIN along with the command you want to execute in JSON in the request body:
|
|
To both mine, and probably my neighbors surprise since I did this at around midnight, the HORN_LIGHT command does not simply beep the horn once and blink the lights like when you lock the car from the key fob. It actually sets the car alarm off until you send an unlock command.
Conclusion
At some point I’ll probably get around to updating my Python script to use the new API at which point you’ll be able to see a bit more about how exactly all of this works. But having spent 3 days figuring out the new API I wanted a bit of a break before delving into how to translate all of this into a Python CLI app. I’m also a bit concerned that Nissan will start blocking their client secrets and passwords or making it more difficult to obtain than simply including it as plain-text in the decompiled source code. Not like I wanted to have to decompile their app just to figure all of this out though. I’d much rather they provide official support for third-party API access, especially given I’m paying something like $12/mo for this service. But that’s almost certainly wishful thinking.
Until next time.